
Ride Around the Bottom Paddock Gold
(New Zealand)
Version No. 1.5
Date last revised: March 18th, 2024
©
2021, Iron Butt Association, Sheridan, Wyoming
Please respect our intellectual property rights.
Do not distribute this document or portions therein, without the written
permission of the Iron Butt Association.
Background
This is a New Zealand based ride.
The Ride Around the Bottom Paddock is roughly 3,050 kilometres.
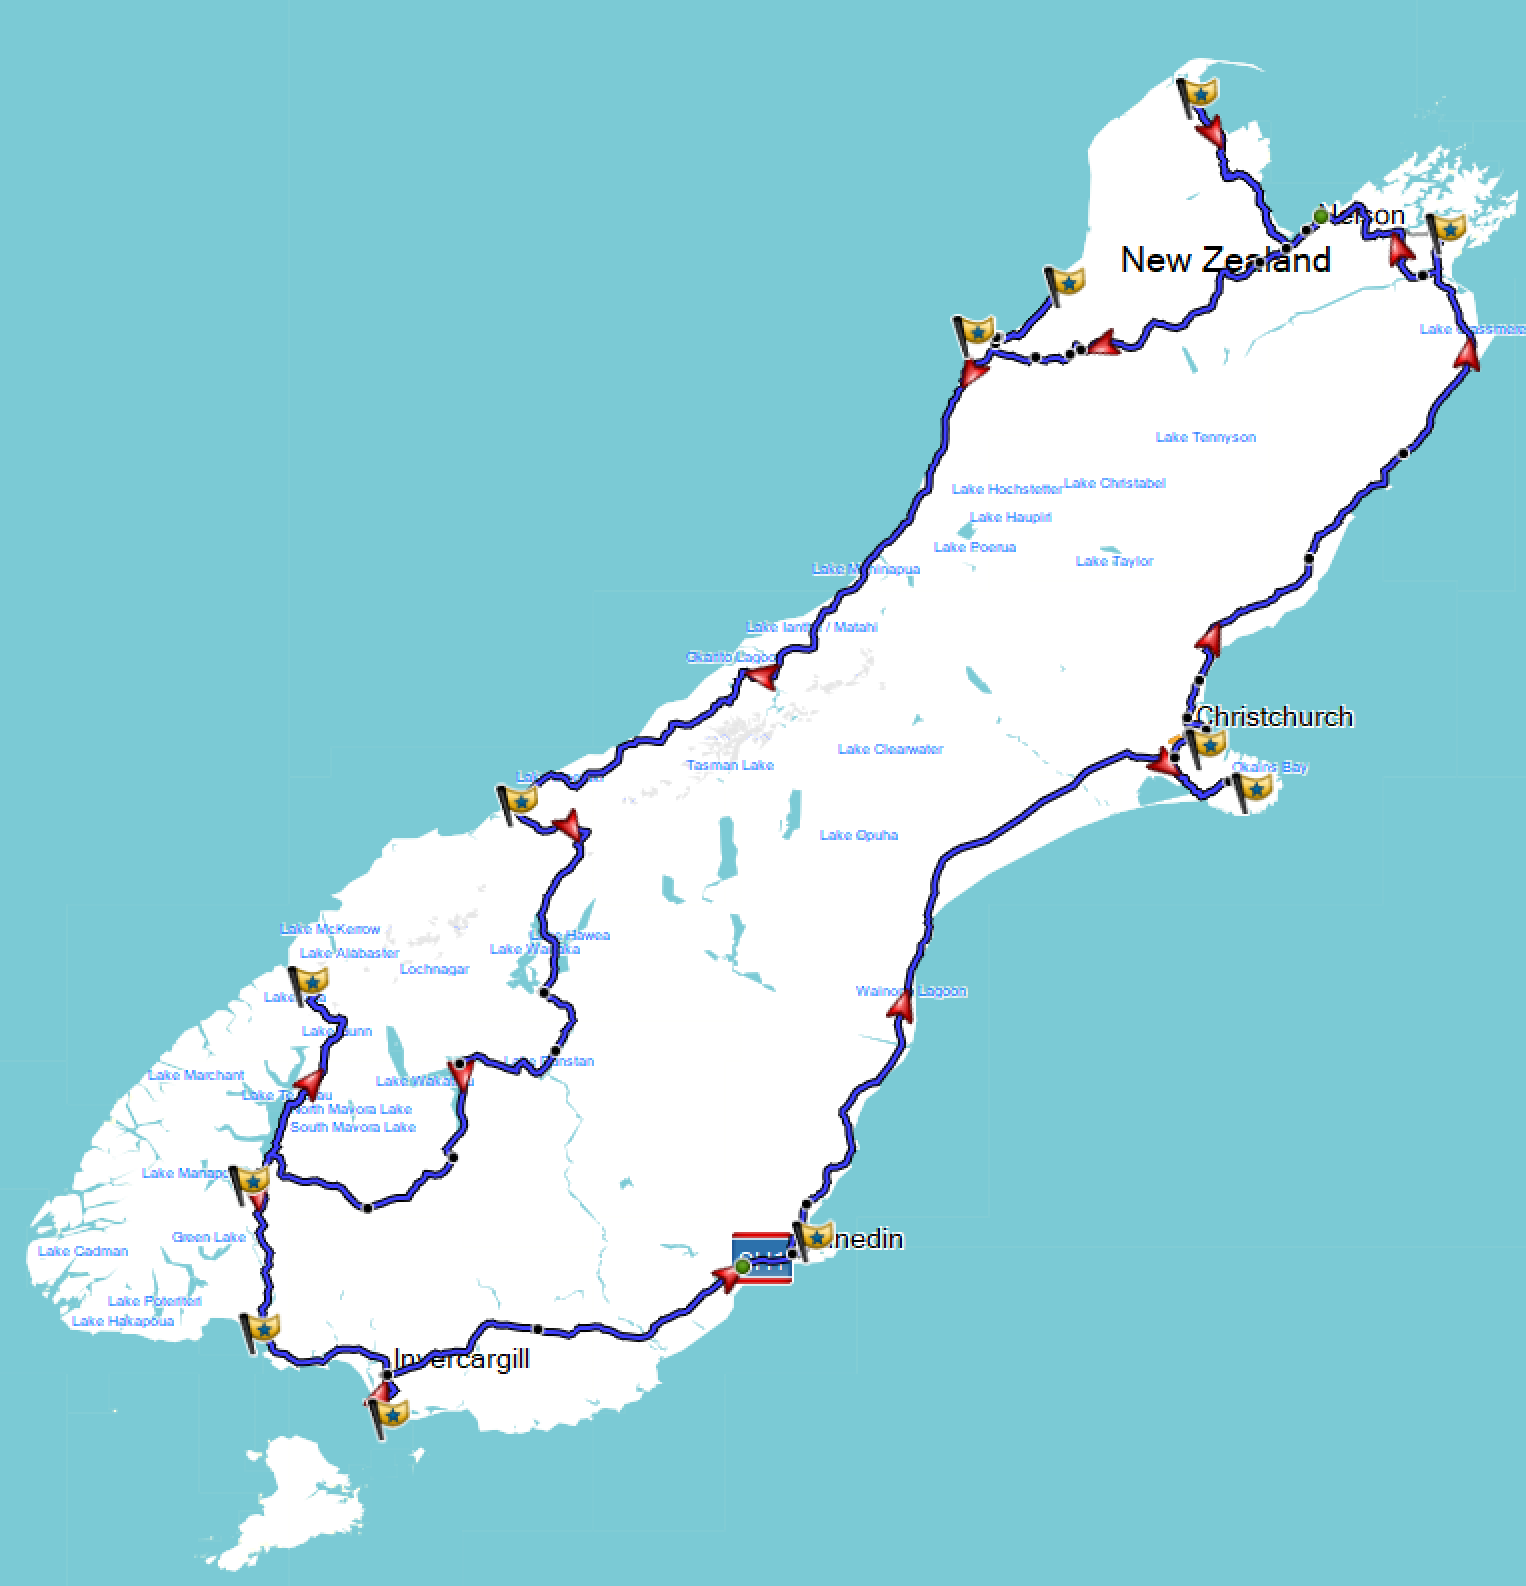
You must ride your motorcycle in a path that traces the outline of the South Island of New Zealand, using the State Highway network of roads.
This ride is one of a pair of rides:
Both are 'Ride-Around' rides, there are different time allowences for the Top and the Bottom paddocks given the difference in length.
These rides have special certificates with a custom design.
An IBA Award certificate 'Checking the Boundary Fences (NZ)' is available for those who successfully complete both rides.
Read the rules for the iconic SaddleSore 1000 on the Ironbutt Association site. The rules for this ride are similar and you will get valuable background information.
Documentation: See here.
Definitions
DBR - Dated Business Receipt
A DBR is a machine generated receipt with the date, time and LOCATION on it. Check it - do not assume it is correct. A receipt with an incorrect time/date/location is worthless. Check and re-check.
Fees
PDF, delivered by email - US$45 or Printed and posted - US$50
Paypal (send to friends and family) to: [email protected]
Rules
- This ride is open to existing IBA members only.
- With one exception: this is also open to anyone who has successfully completed a New Zealand Distance Rider's NI1600 event within the previous five years. - There has been a long standing reciprocal arrangement and recognition of this event.
- SpotWalla IS REQUIRED for this ride.
- You can ride the route in either direction, clockwise or anti-clockwise.
- This ride can be started anywhere along the loop-route around the Island, you must start and end the ride at the same location, i.e. same DBR.
- You must visit each of the numbered checkpoints in proper, full sequential order (either clockwise or anti-clockwise), and obtain a photograph of your bike at each point.
- There are some standard IBA approaches taken when you cannot reach a required checkpoint which include:
- Getting as close to the checkpoint as possible, and documenting (with evidence) why you could not reach the checkpoint (e.g. a photo of your bike next to the Road Closed sign).
- Checking for other means of accessing the checkpoint (using an alternative route or detour) and exhausting all reasonable options - documenting each.
- If you are exhaustively forced to miss a checkpoint, and if missing that would reduce your ride's overall distance below 3,000km, then you must make up that lost distance by adding your own additional detour into the route at some point within the permitted timeframe.
- Include your documentation within your ride submission.
- Missing up to a single checkpoint with satisfactory, extenuating evidence will be considered, but no more than one.
- A minimum of 3,000 kilometres is required for this certificate, it is more likely that your route will be approximately 3,050km, you must complete your ride within 48 hours (~64km/h overall avg).
General
- Ride-start and ride-end receipts should be annotated with your bike's odometer reading and should be photographed, clearing showing all details on the receipt, along with a clear view of your bike's odometer, these need to be submitted as part of your ride verification request.
- DBRs should be kept for all fuel stops, numbered and annotated with your bike's odometer reading for each stop - these may be called upon during ride verification.
- Photographs of checkpoints can be accumulated on your SpotWalla track (preferred), or provided separately to your ride verifier.
Checkpoints:
Downloadable files / references
Overview map
Checkpoint details
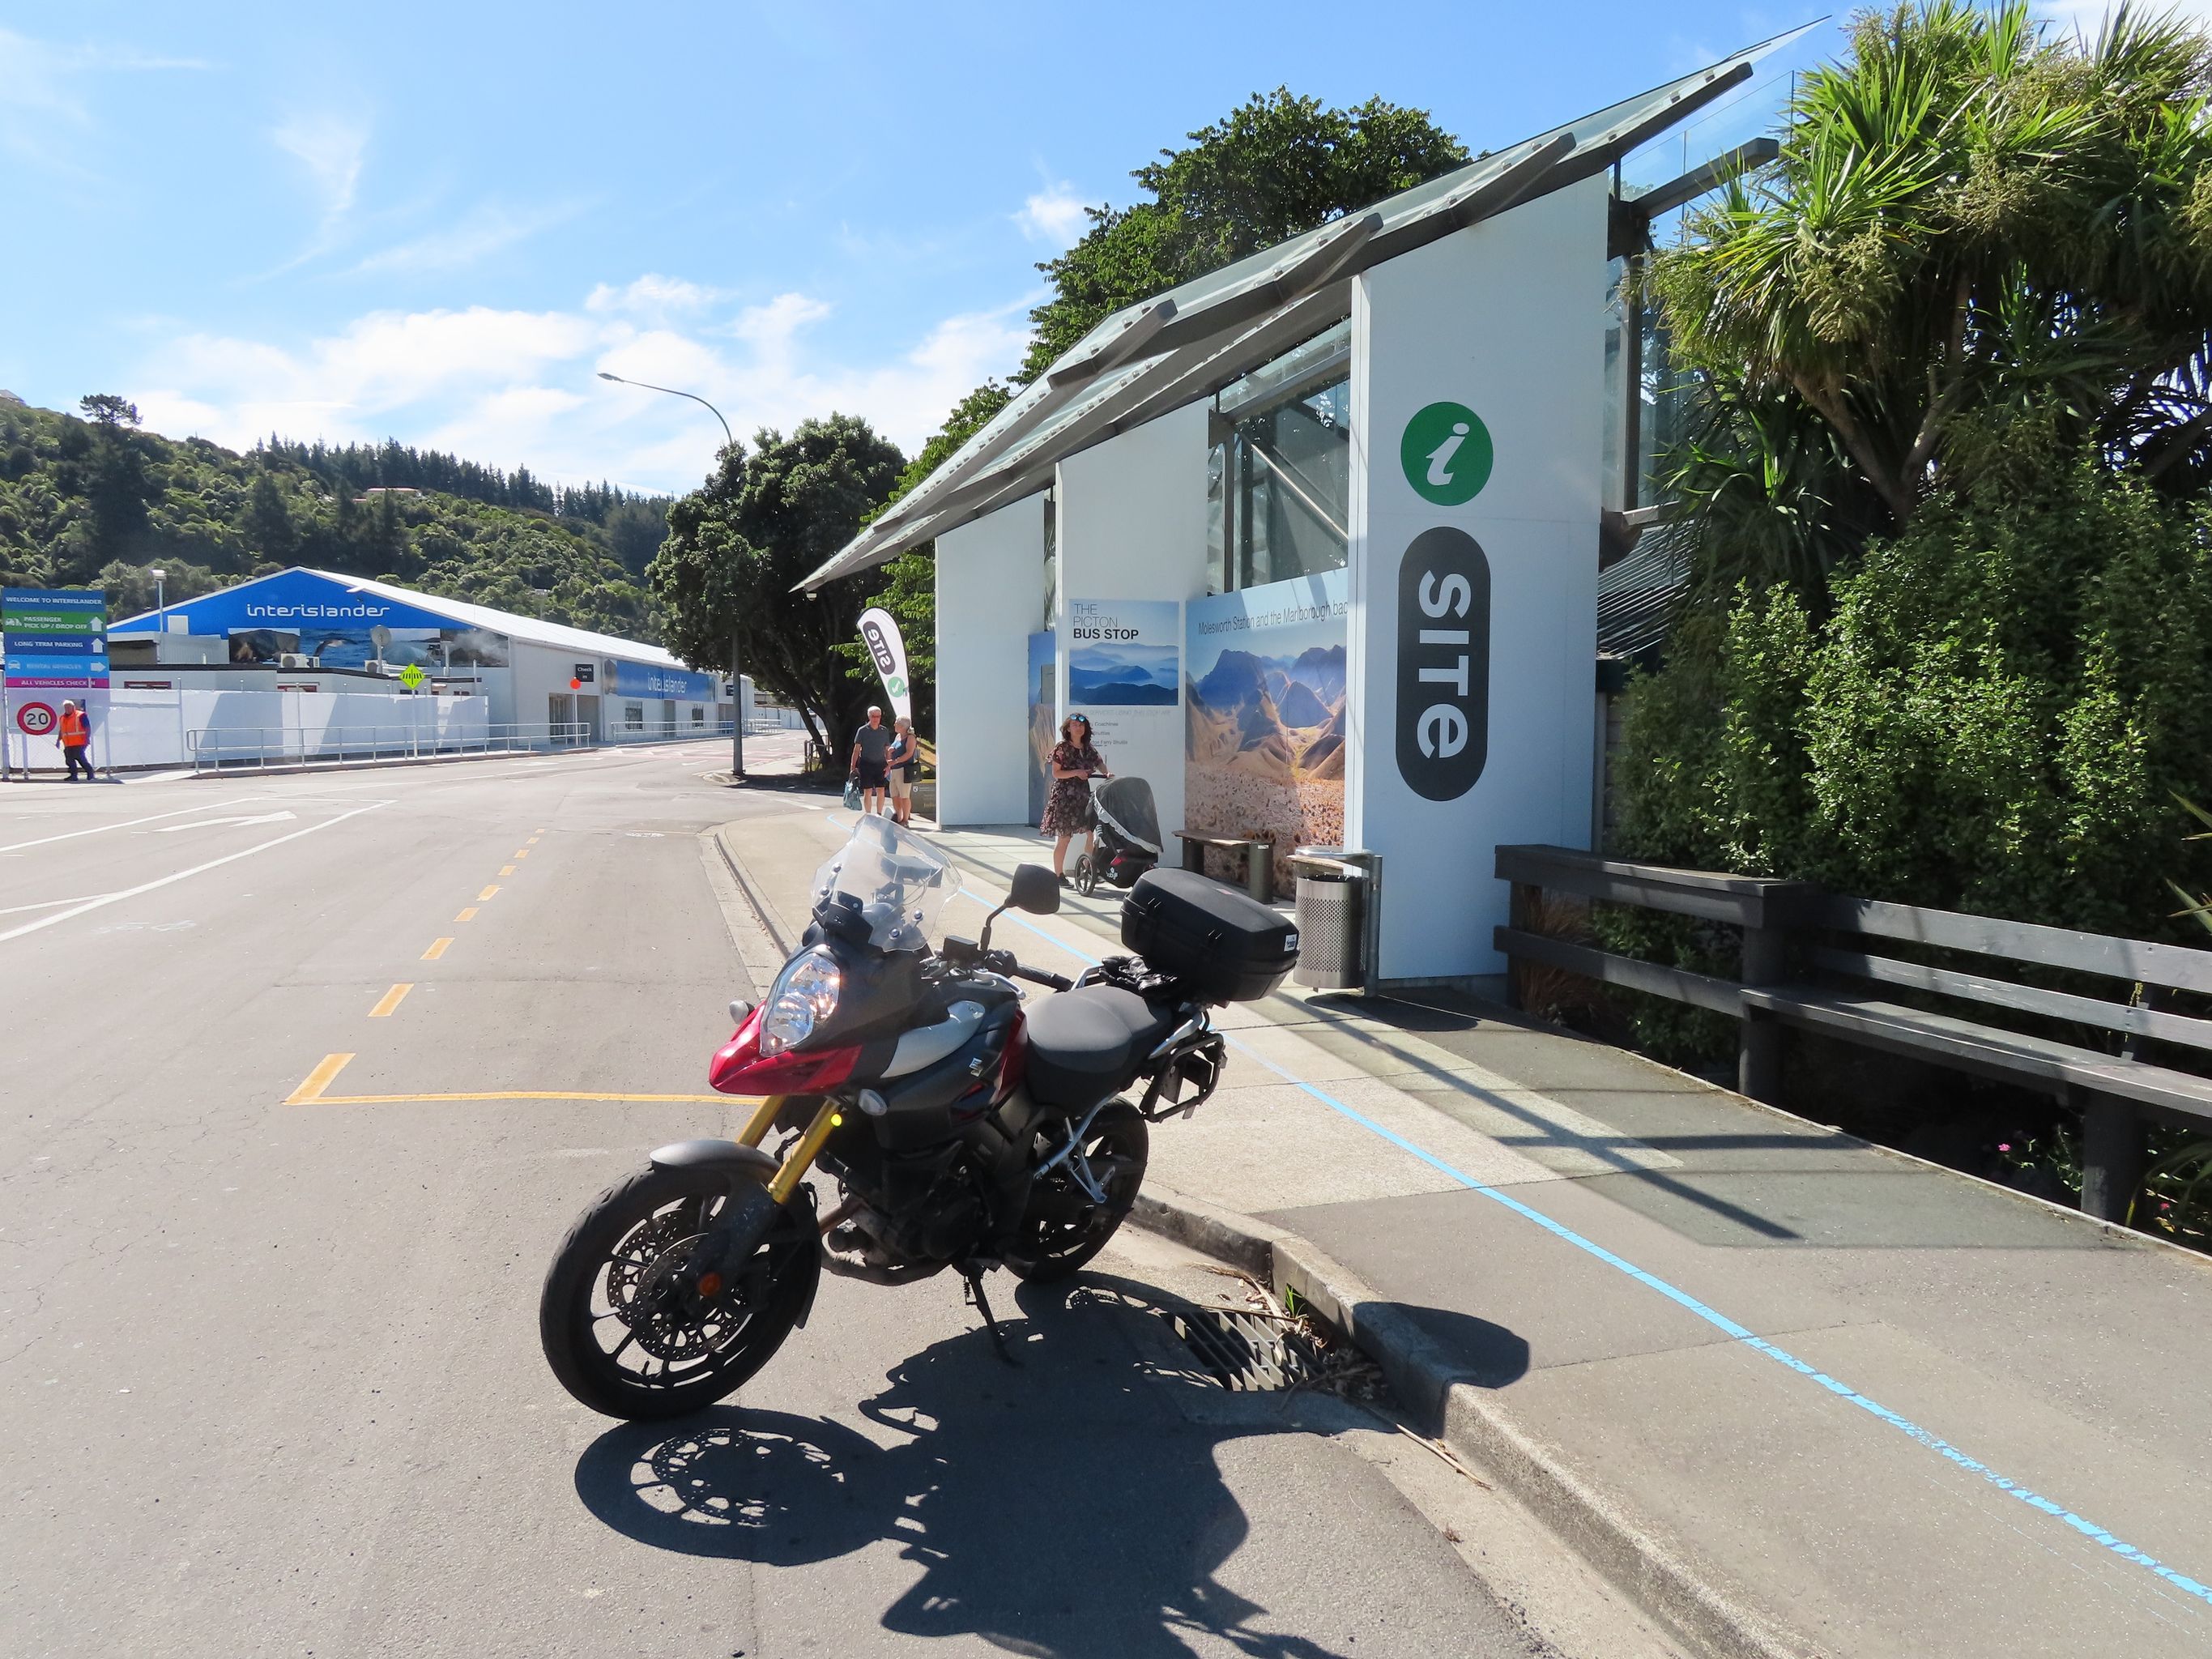
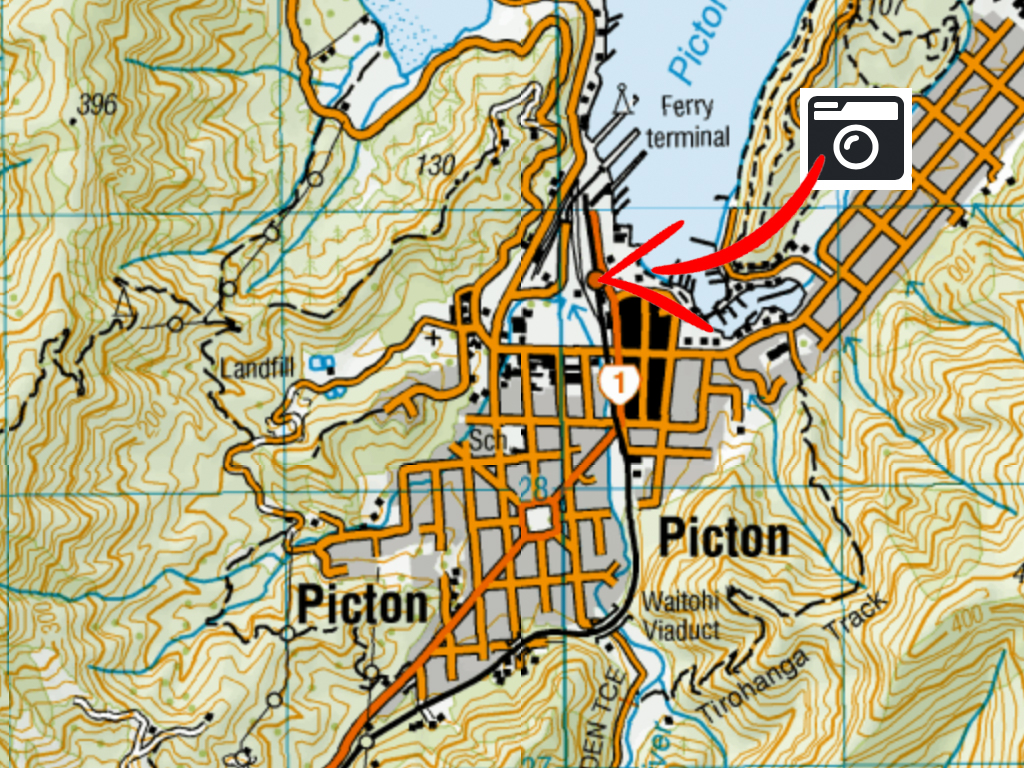
| Name #1 - Picton |
| Coordinates: -41.28830, 174.00519 |
| Description: Bike near the i-site signage. |
Sample Photo
 |
Map
 |
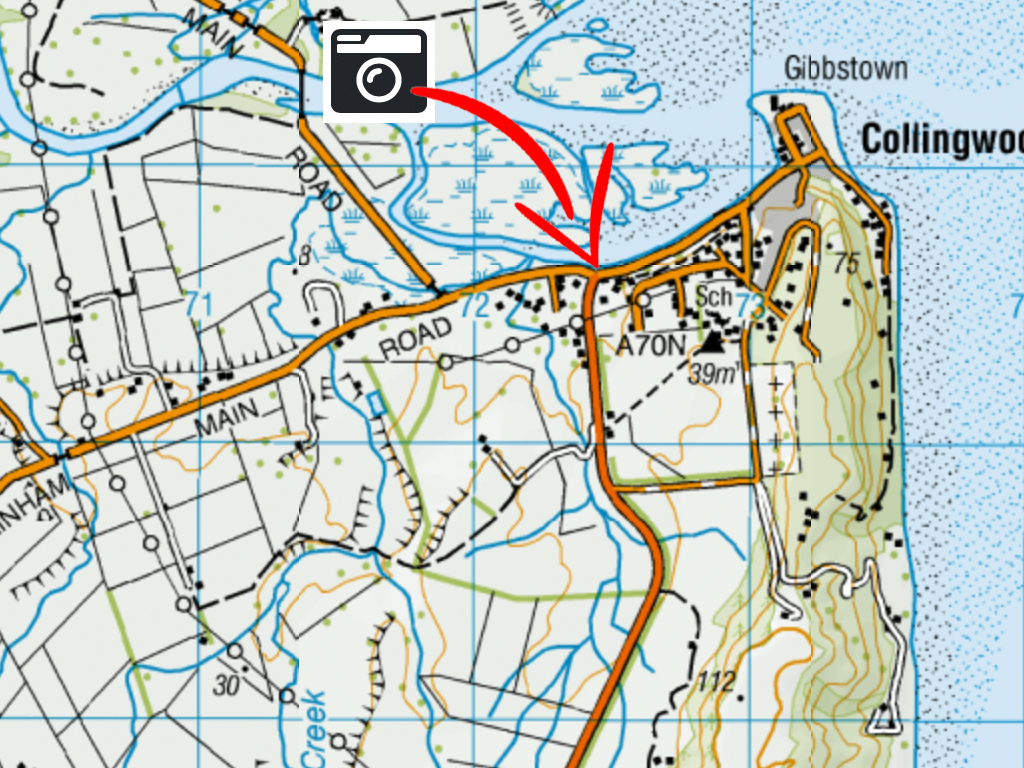
| Name #2 - Collingwood |
| Coordinates: -40.68096, 172.67382 |
| Description: Main Road Signage at junction |
Sample Photo
 |
Map
 |
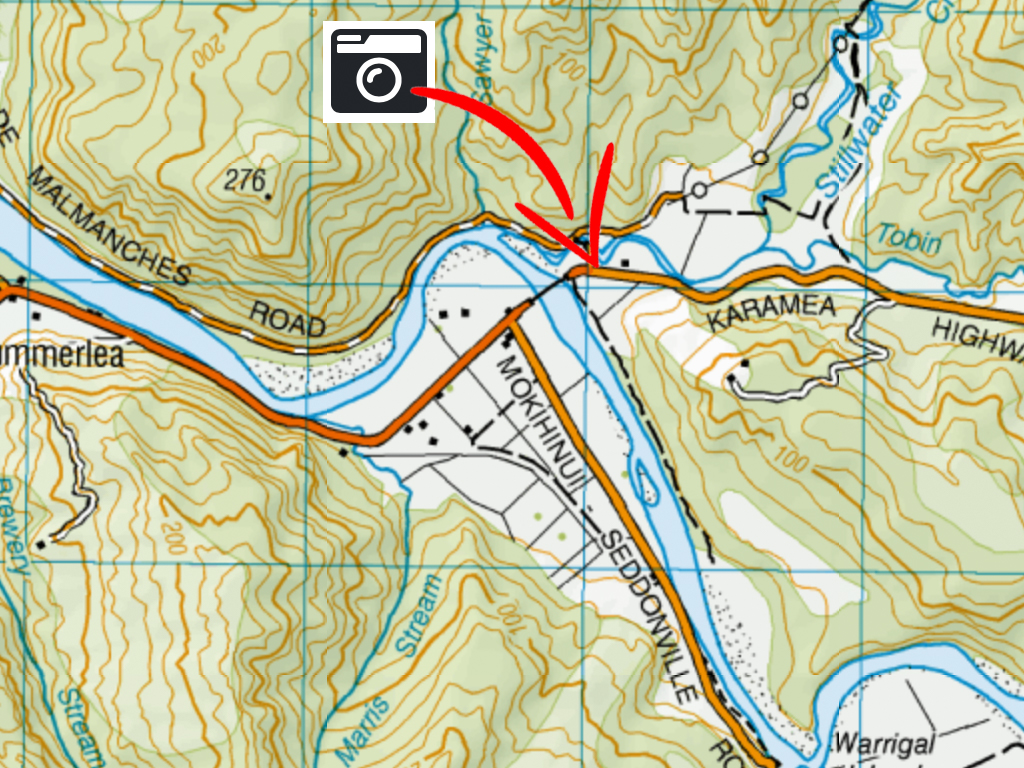
| Name #3 - Mokihinui |
| Coordinates: -41.52853, 171.96947 |
| Description: Look for the end of SH sign. |
Sample Photo
 |
Map
 |
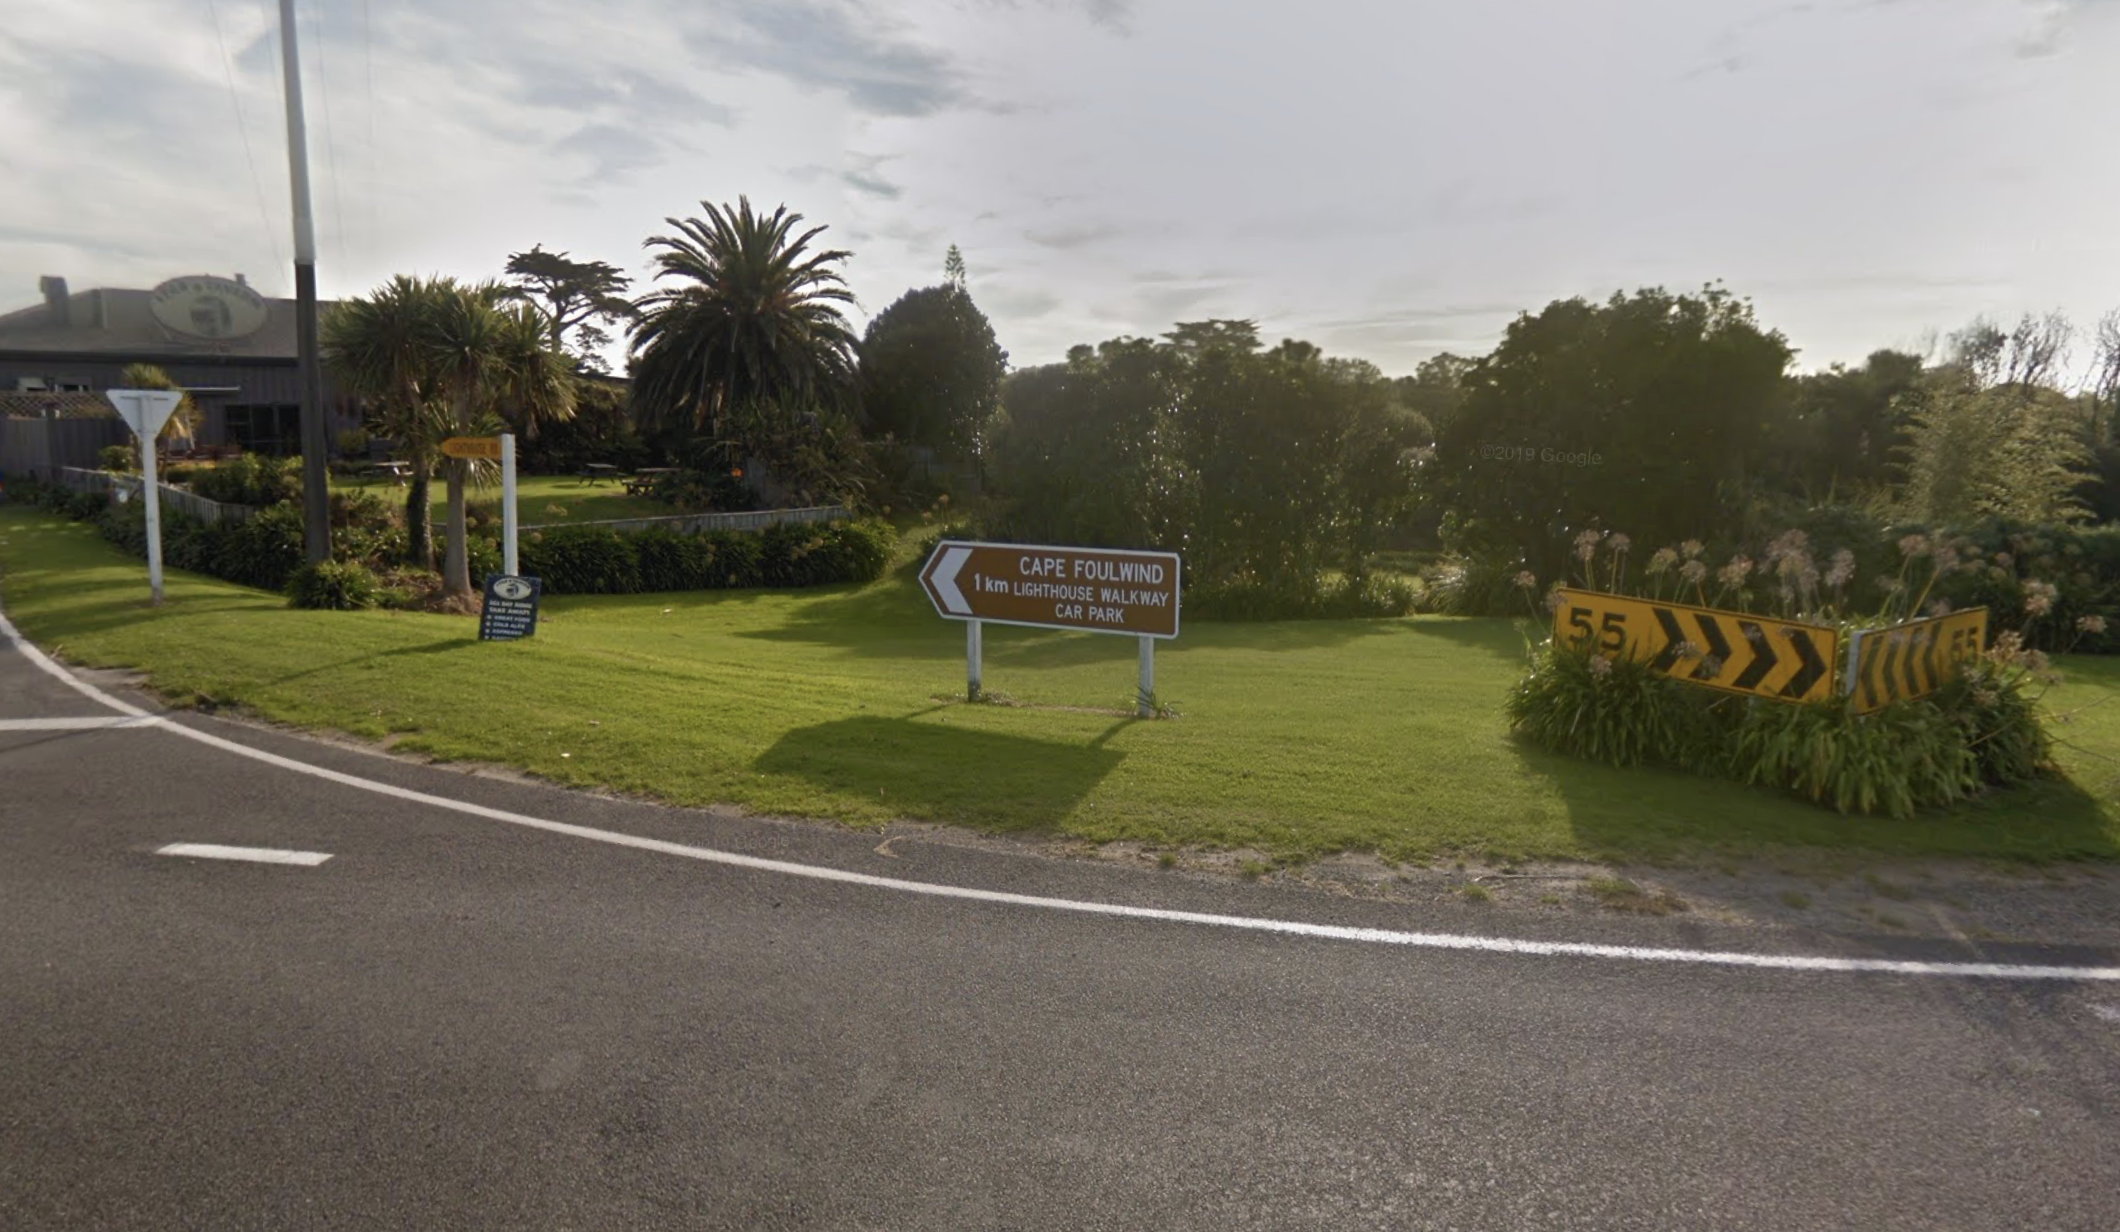
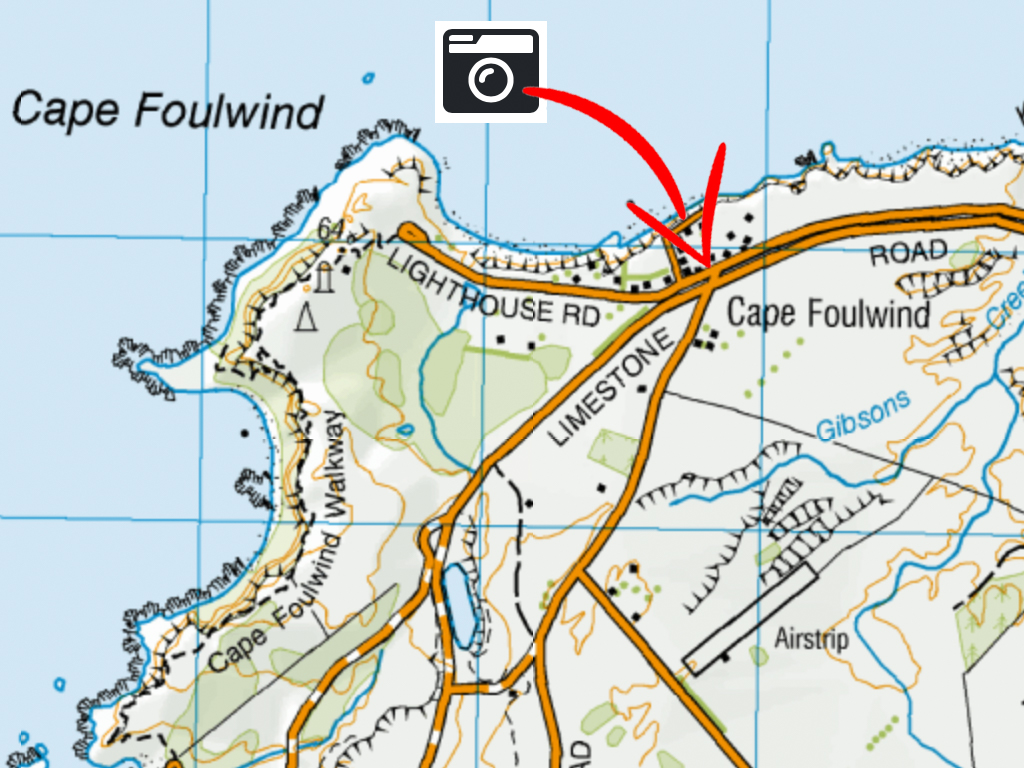
| Name #4 - Cape Foulwind |
| Coordinates: -41.749633, 171.482344 |
| Description: Use the road-signs showing the route to Cape Foudwind. |
Sample Photo
 |
Map
 |
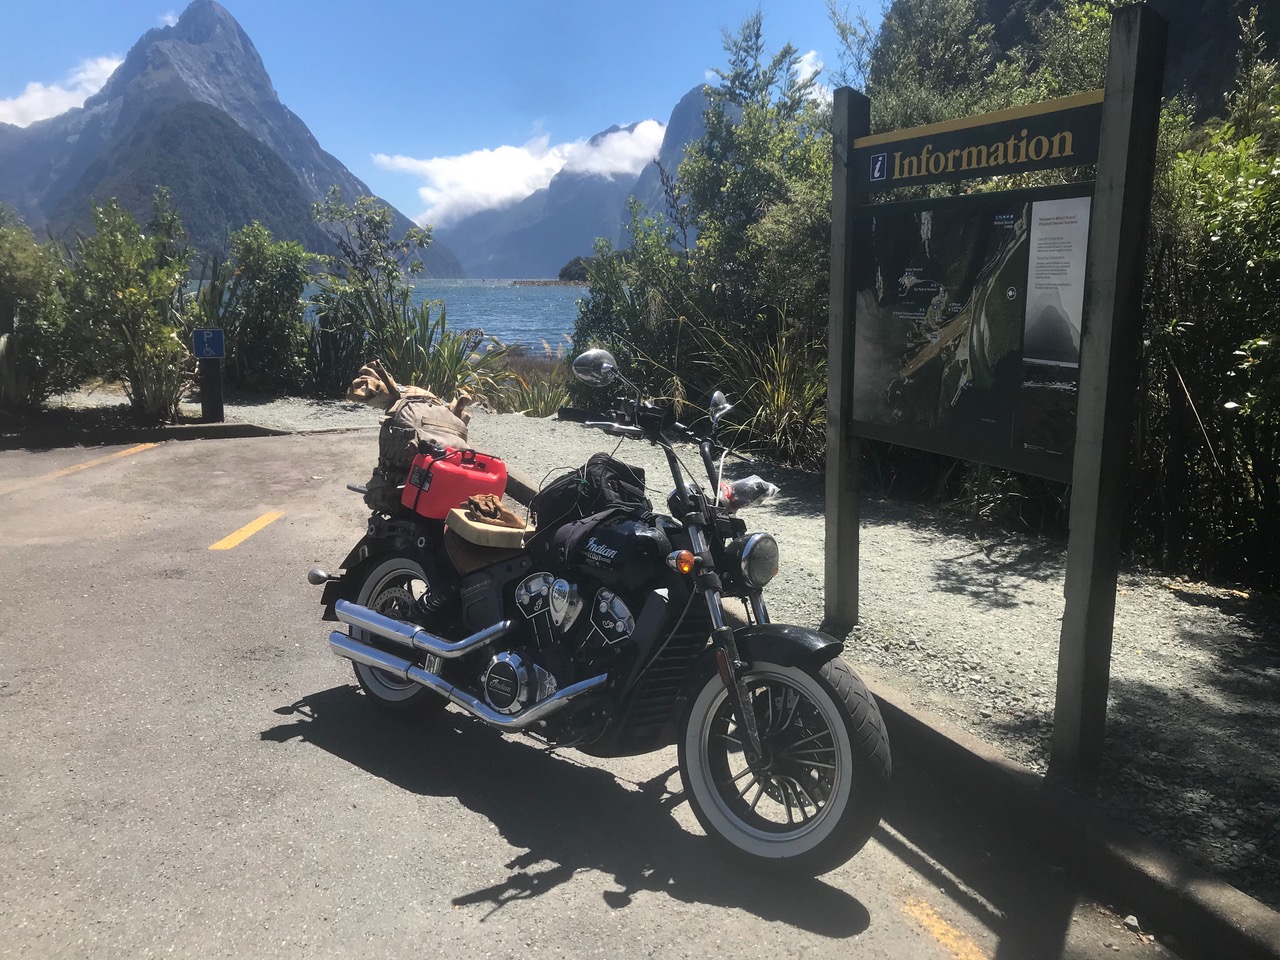
| Name #5 - Milford Sound |
| Coordinates: -44.67196, 167.92852 |
| Description: By Information Board, at the end of the Main CarPark, this is NOT down by the Tour Boat Terminus. |
Sample Photo
 |
Map
 |
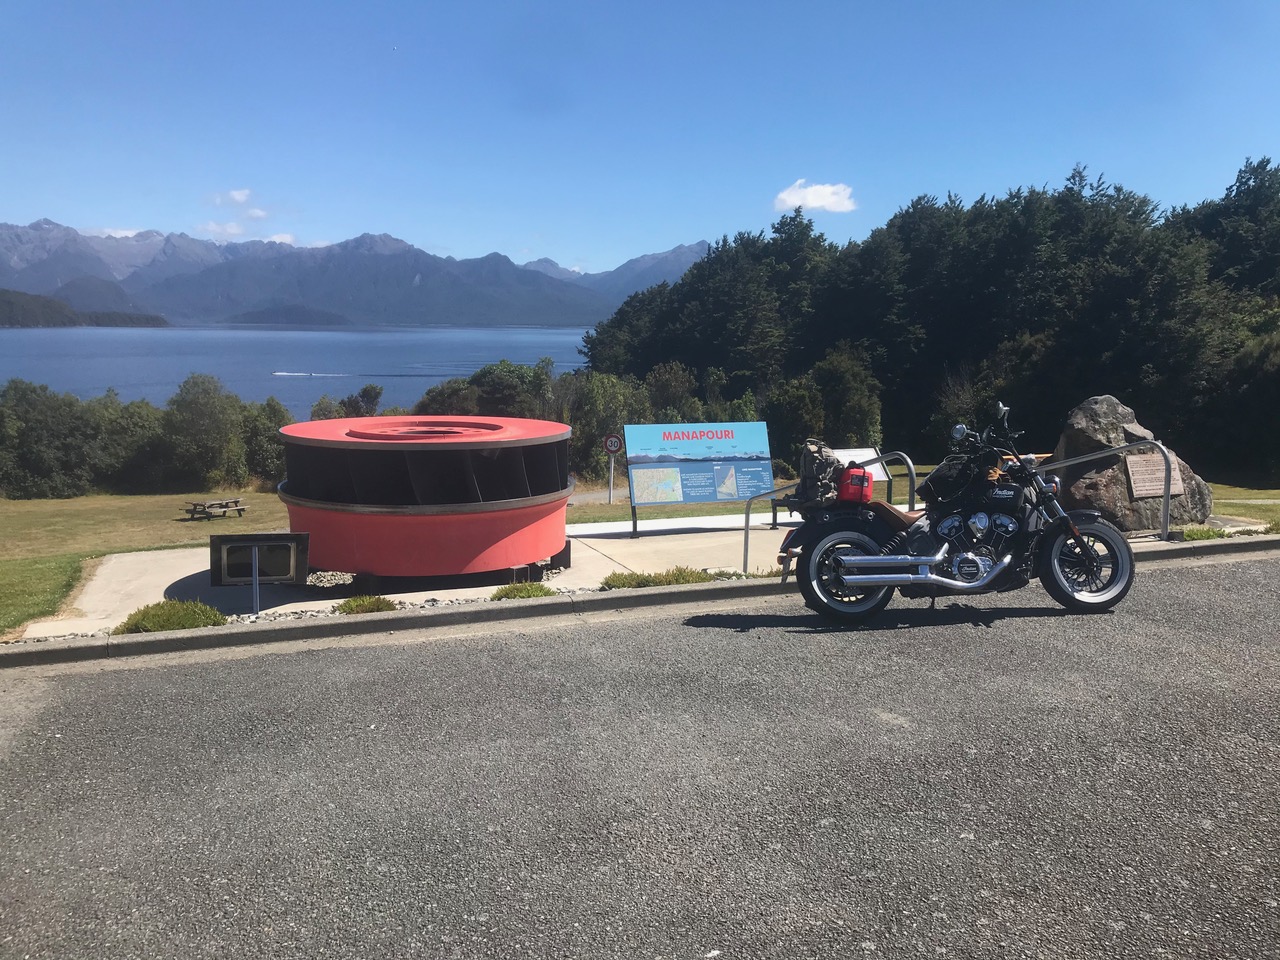
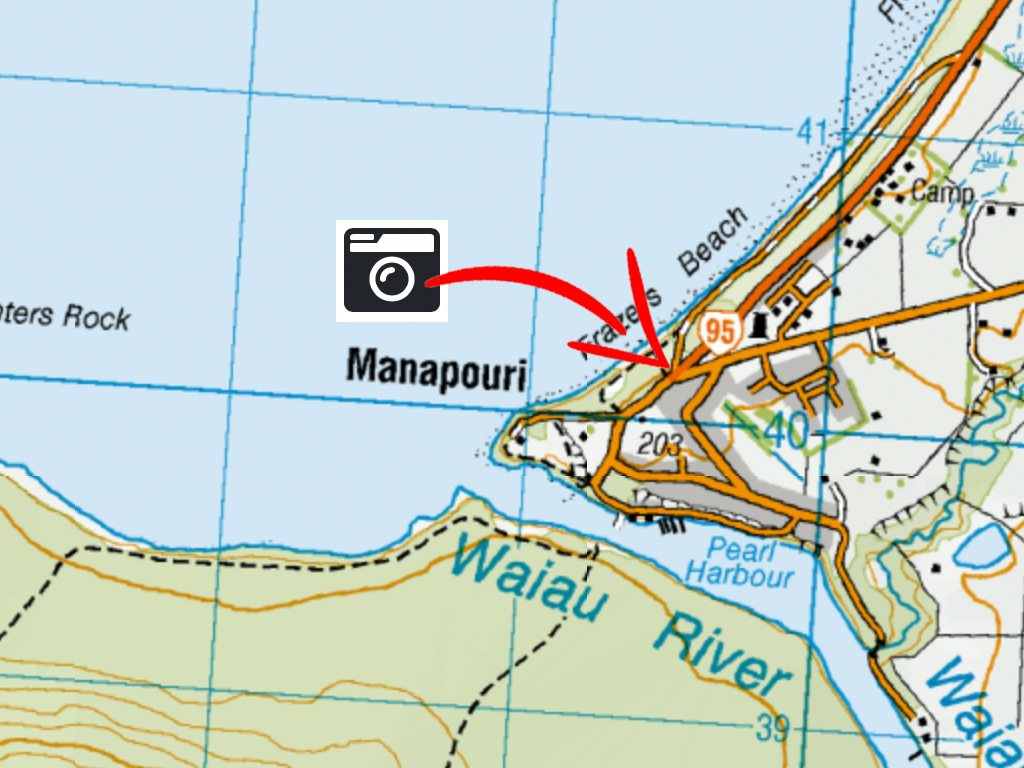
| Name #6 - Manapouri |
| Coordinates: -45.5646, 167.61156 |
| Description: Park up by the named board with the fantastic view. |
Sample Photo
 |
Map
 |
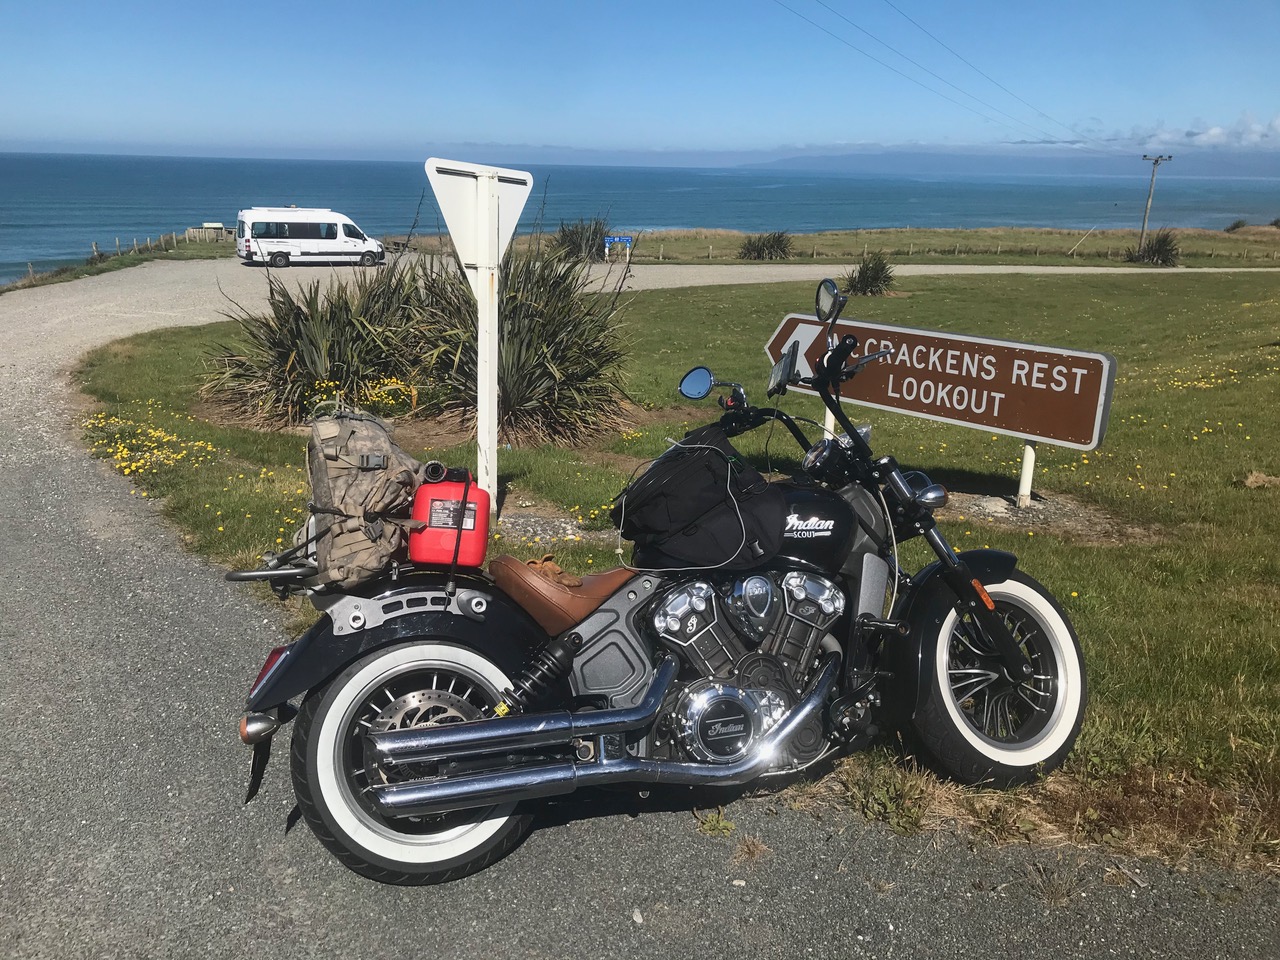
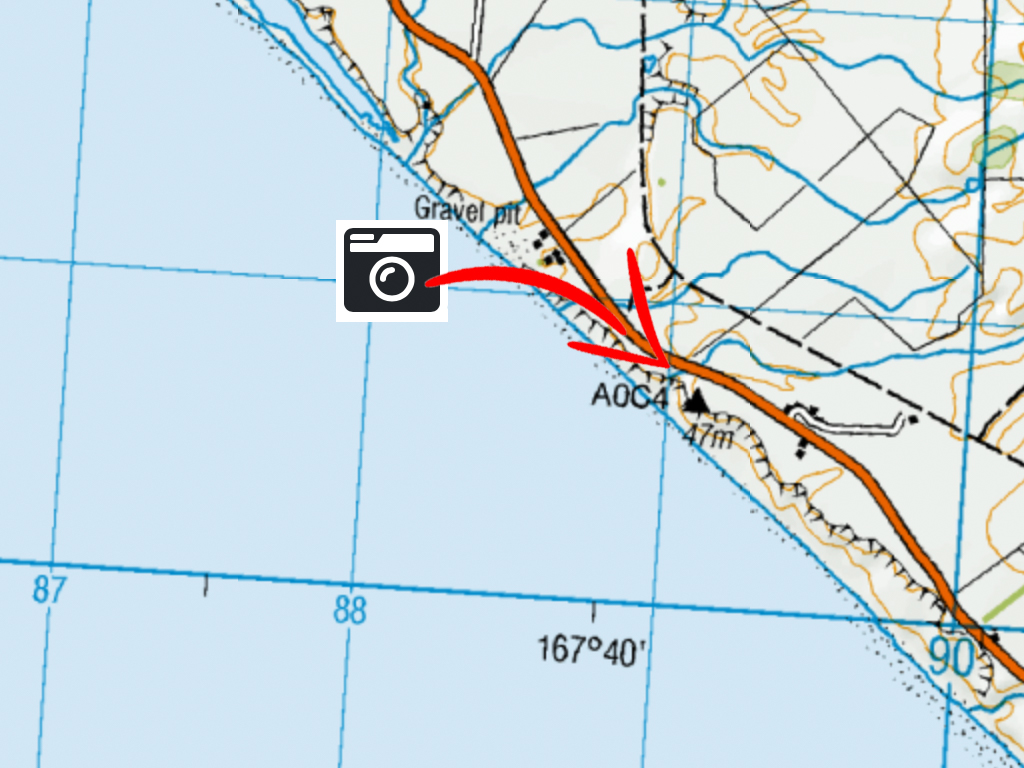
| Name #7 - McCracken's Rest |
| Coordinates: -46.22784, 167.66978 |
| Description: Pull just off the road, and park up next to the signage. |
Sample Photo
 |
Map
 |
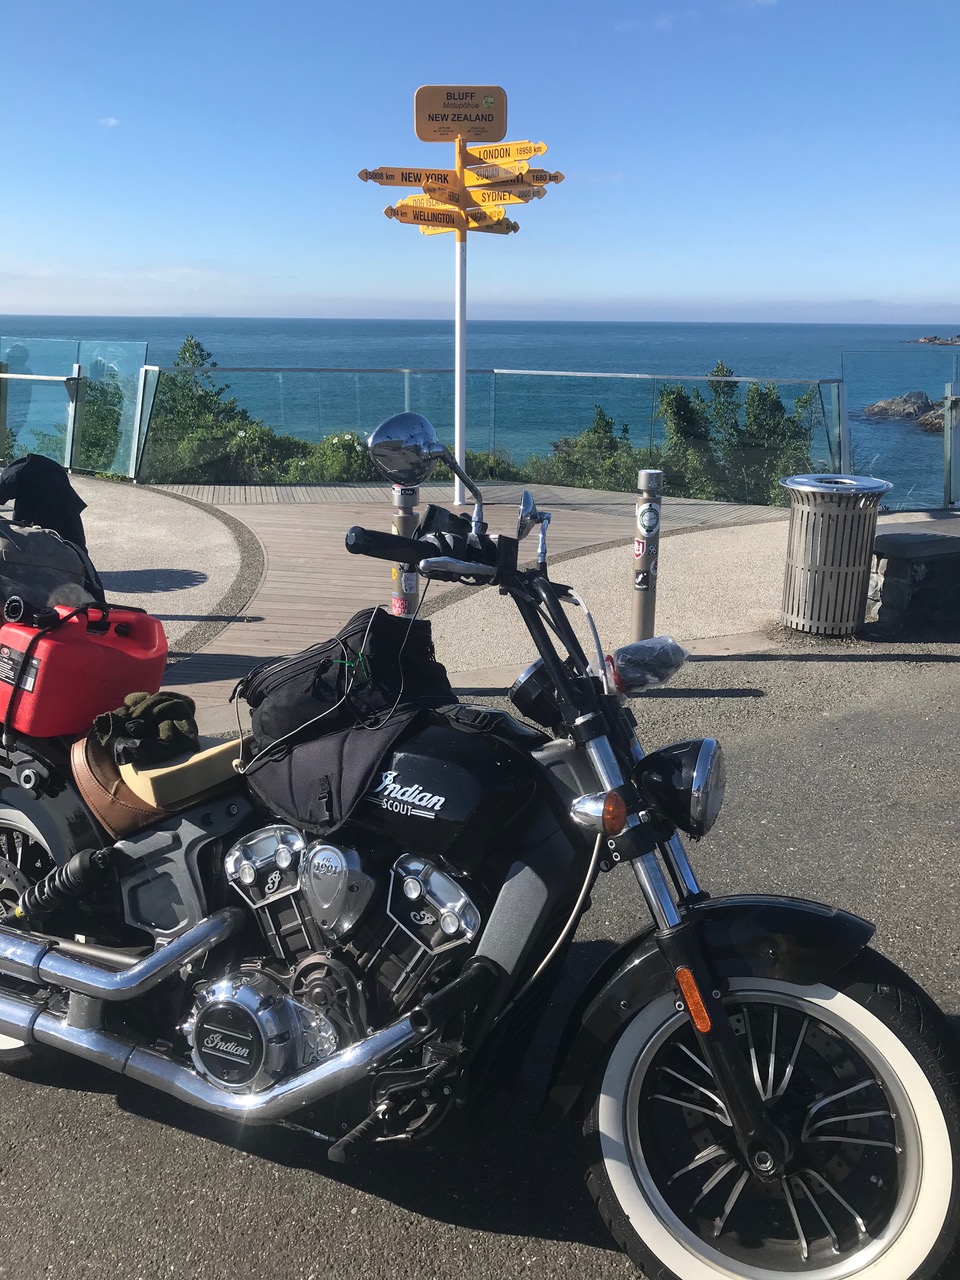
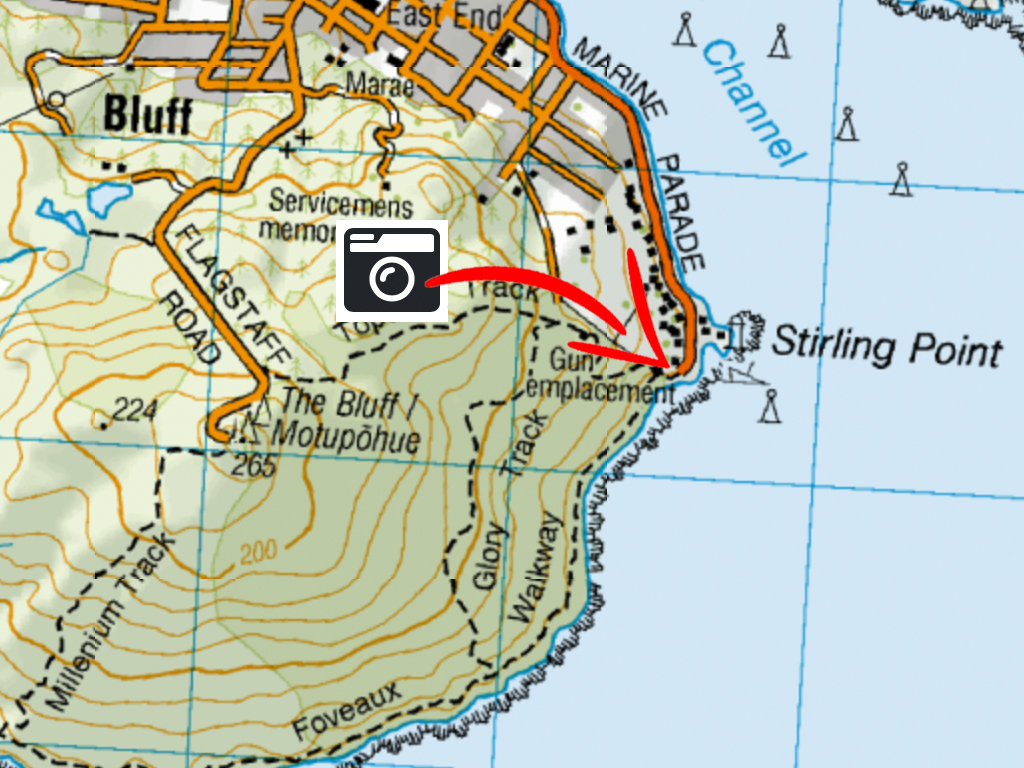
| Name #8 - Bluff |
| Coordinates: -46.61338, 168.35723 |
| Description: Your bike in front of the iconic Bluff signposts. |
Sample Photo
 |
Map
 |
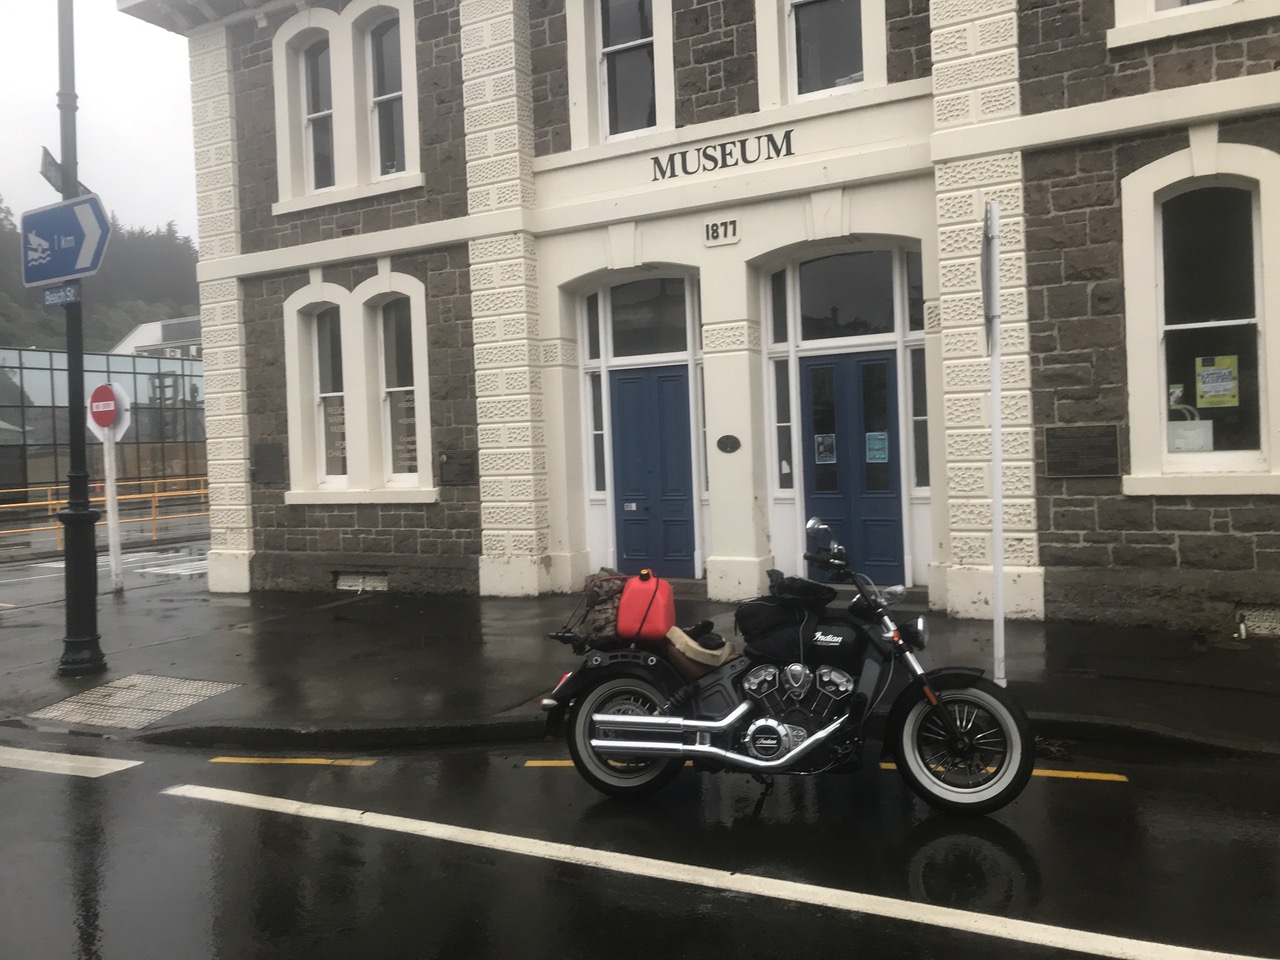
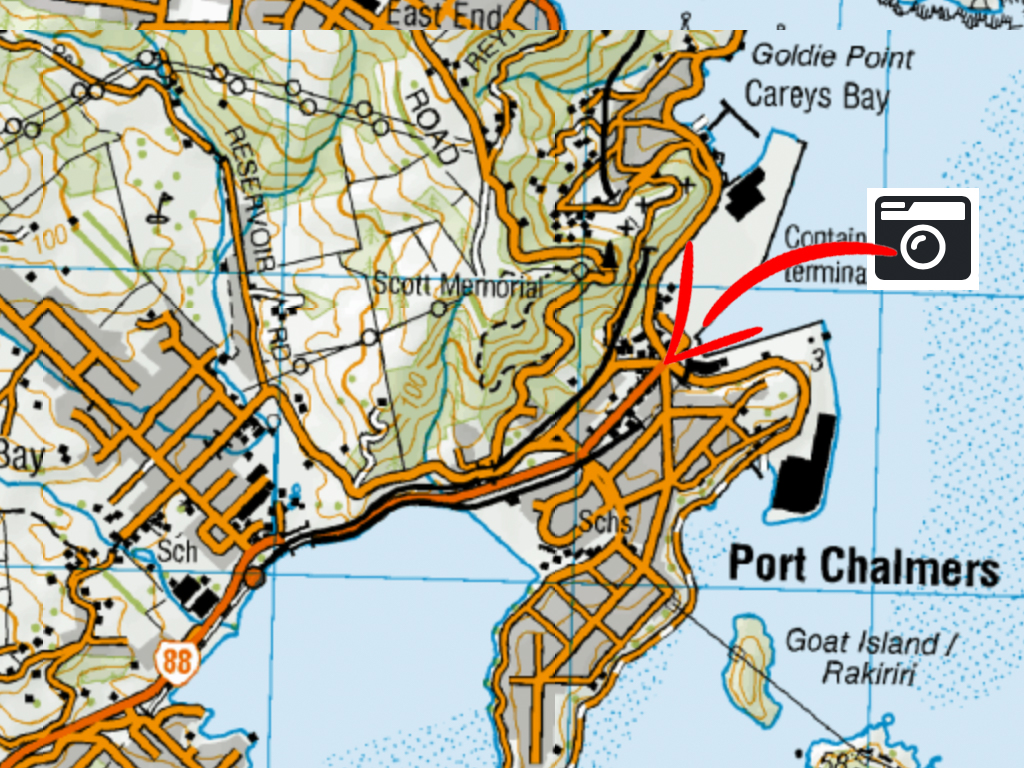
| Name #9 - Port Chalmers |
| Coordinates: -45.81508, 170.62247 |
| Description: Park somewhere safe and suitable outside of the Museum, there is a safe area inside of the yellow lines. |
Sample Photo
 |
Map
 |
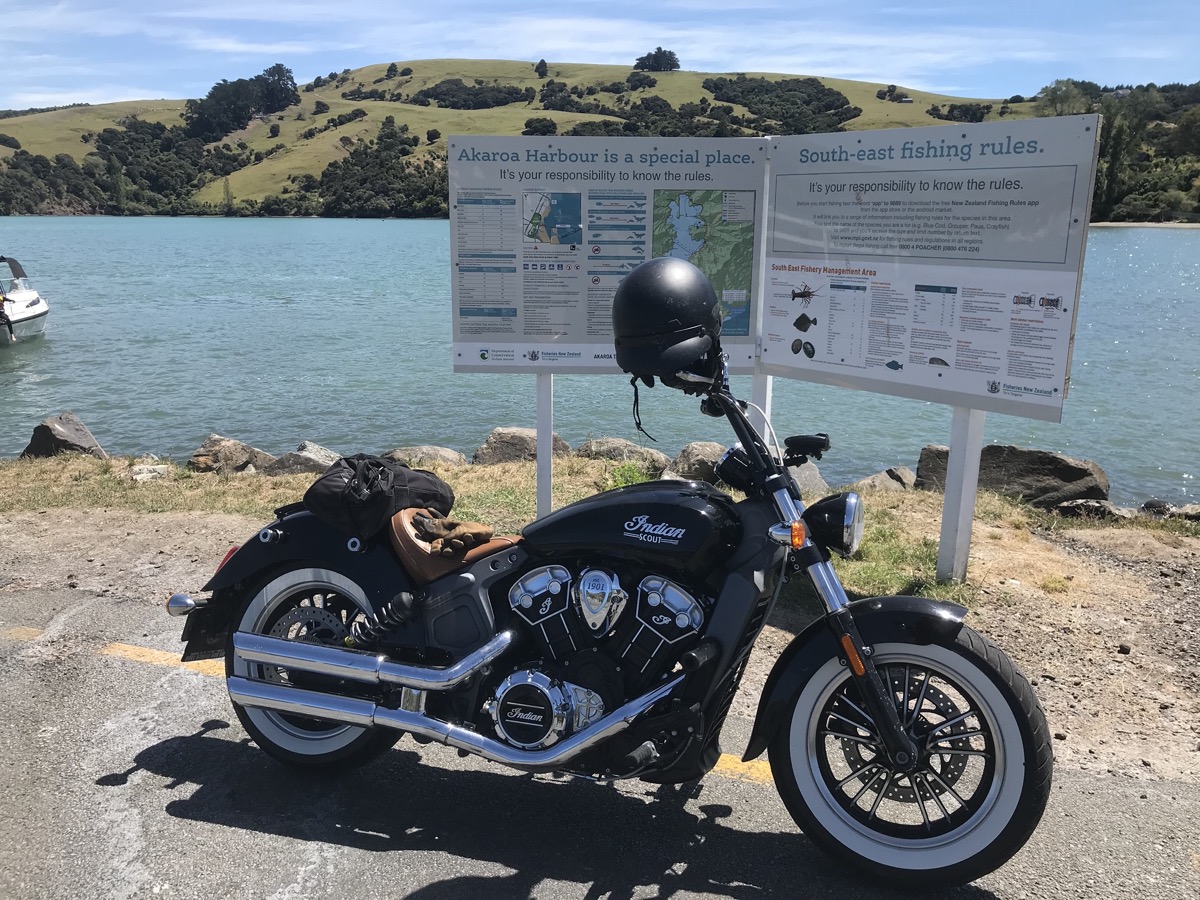
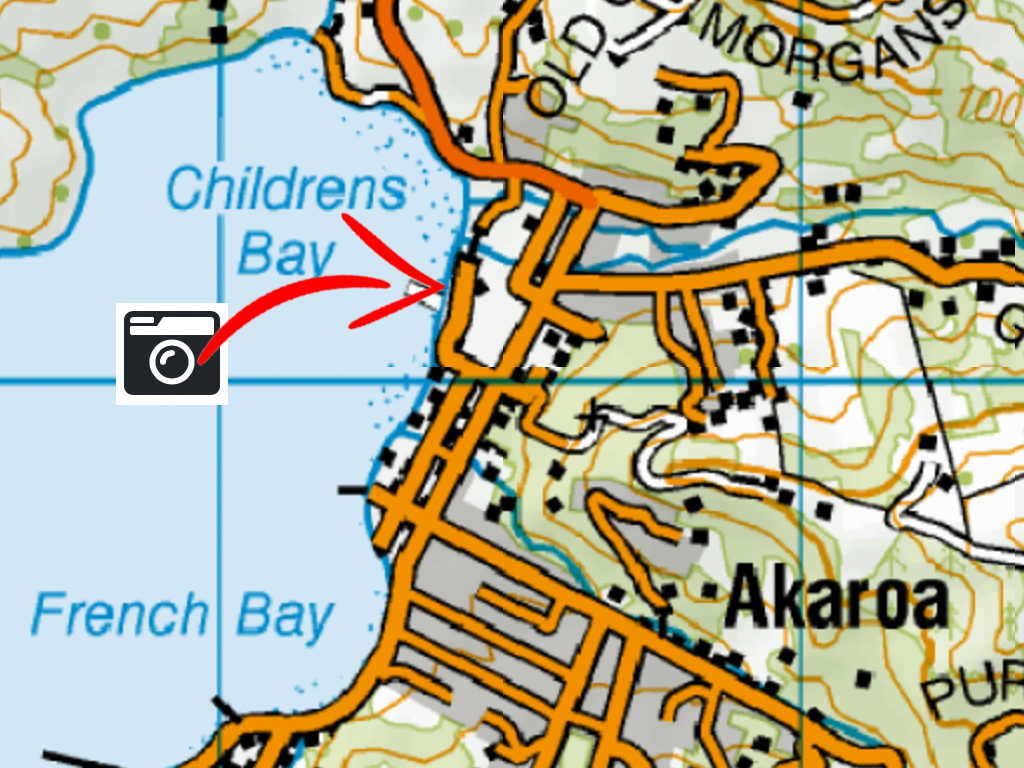
| Name #10 - Akaroa |
| Coordinates: -43.801650, 172.967310 |
| Description: Find the named information board to the right of the wharf and take a photo of your bike infront of it. |
Sample Photo
|
Map
 |
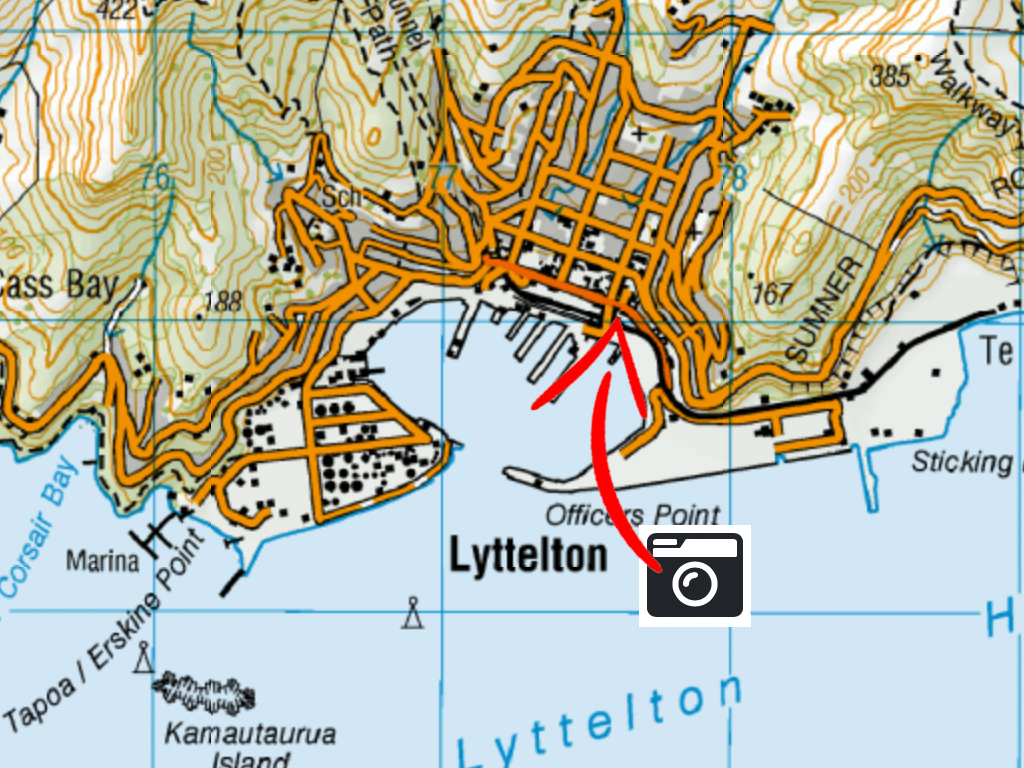
| Name #11 - Lyttelton |
| Coordinates: -43.604080, 172.722310 |
| Description: Park outside of 'Super' - which used to be the original Harbour Master's Building. |
Sample Photo
 |
Map
 |
Notes on Routing
While the intention of the ride is to explore this specific type of 'Ride-Around' route, one which finds the closest path to the periphery of the island using the State Highway network, the following specific allowances are offered in order to make this extreme ride, more enjoyable:
- Between CP1 (Picton) and CP2 (Collingwood):
- You can take the Highway route, or the slower, but shorter, more scenic route between Picton and Havelock - watch your overall km if you do this.
- Various areas in the north have large sections of reduced speed zones, plan for this, please respect those reduced speed zones.
- Takaka Hill is now fully open. - this used to add significant delays while the long phasing lights were active, this is no longer the case.
- Between CP4 (Cape Foulwind) and CP5 (Milford Sound):
- Into Queenstown? - The State Highway carries on from Frankton into Queenstown, but that section of road, while incredibly beautiful is a slow drag in, and a slow drag out. We are not requiring you to include that segement of the State Highway in your ride, it will add nothing positive to this ride.
- Crown Range vs via Cromwell? - The 'Ride Around' route is designed around using the State Highways. The Crown Range is not a State Highway. You can however choose whatever route you want to use between each checkpoint. If you do use the Crown Range, then be aware of your overall ride distance and make sure you finish with more than 3000km!
- Homer Tunnel - Traffic lights control movement with countdown timers. Traffic lights over peak periods in summer months control traffic flows through the tunnel and can create delays of up to 20 min (each way).
- Between CP6 (Manapouri) and CP7 (McCracken's Rest):
- South of Manapouri we decided to route off the State Highways for a short period to better connect SH95 to the end of SH99 without adding a reasonably pointless and significant diversion through Lumsden. This connecting road is knwon as the 'Southern Scenic Route' and it is of State Highway quality. There are a series of bends around -45.738224, 167.691810 which is one of my favourite pieces of South Island Tarmac.
- Between CP11 (Lyttelton) and CP1 (Picton):
- Kaikoura is now open again, alebit with reduced speed limits through a lot of it.
- Planning around these known constraints (to absorb them, or to avoid them) is one of the expected challenges of this ride.
Tips - Plan your ride timing to avoid:
-
- Tourist traffic going to Milford Sound.
- Hours of traffic control through Homer Tunnel (outside of busy hours, these lights are off - do some research if you're not already aware of this).
- Slow, busy times in Motueka.
- Really bad weather.
- Night time availability of fuel in West-Coast / Northern West-Coast locations.
- If you're wearing a full face helmet at Milford, then don't open your visor, the sand-flies will jump in there and you'll spend the next hour or more trying to eat them to stop them from biting you.
You may not be able to avoid all of these, so your job in planning this well, is to weigh them up and decide what is most important to you.
Nesting other rides
This ride requires a minimum of 3,000km within 48 hours, you may nest other rides within this, or nest this within others that would normally be permitted within the standard nesting rules.
Merchandise
There is no additional merchandise for this ride.
|